Posts

Storybook Gnomes Cards Class

Image
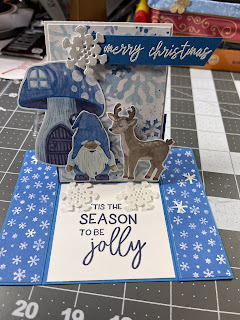
STORYBOOK GNOMES DSP CLASS 11-2-22 I will be adding the cutting dimensions for the cards and box we made yesterday during our LIVE 😊 MINI EASEL CARD Card base 5 1/2” x 8 1/2”  score at 4 1/4” Fold in half. Place unfolded card in trimmer with the 5 1/2” side up  line up at 1 1/4” and cut from score line to one edge.  Flip the card have upside down, line up the other side at 1 1/4” and cut from center to edge (on the same side as first side) Now adhere the two side panels into the card front   Score the center flap at 2 1/8 and fold mountain style m.  This will creat the easel   Basic white card stock 4 1/8” x 1 1/8” —2 pieces DSP:   Pattern 1   4 1/8” x 1 1/8” —2 pieces Pattern 2   4 1/8” x 2 7/8” Die cuts and sentiment pieces that match your DSP to create your front focal point   For assembly instructions, please watch the video tutorial in the “Kreating with Sandra” Facebook group page dated 11-2-22.   POP-UP CARD Card base  4 1/4” x 11” scored at 5 1/2” Pop up mechanism 4” x 4 1/2”
Image
  Friendly Hello          Friendly Hello Sale-a-bration Stamp set  and coordinating DSP       Everyday Label punch          Layering Circl e  dies       Iridescent        Blender pens in Fresh Fresia, Pool Party, and Daffodil Delight       Wink of Stella        Pool Party Sheer ribbon                    Card 1               Card base -   Pool Party card stock 5 1/2" x 8 1/2"    Scored at 4 1/4"               Layer 1     -       Friendly Hello DSP 4" x 5 1/4" (Pattern1)               Layer 2     -        3/4" x 5 1/4" (Pattern 2)               Layer 3      -      Die cut oval about 2 3/4" wide (Pattern 3)                 Layer 4      -      4" x 5 1/4"  (inside panel)               Envelope     -     DSP Pattern 1   2 1/4" x 6"               Fresh Fresia Open Weave ribbon               Tasteful Textures embossing folder               Assembly:               1.  Fold card base and burnish with bone folder.               2.     
Image
  Eden's Garden         Eden's Garden Stamp set         Eden dies Card 1               Card base - Sahara Sand card stock 5 1/2" x 8 1/2"    Scored at 4 1/4"               Layer 1     -     Evening Evergreen               Layer 2     -     Soft Succulent 3 1/4" x 4 1/4", emboss with Tasteful textiles folder               Layer 3    -      Ever Eden DSP 2' x 4"  Use Tailored tag punch to create banner end               Layer 4    -      Basic white  2 1/2" x 3 1/2"                Layer 5      -      4" x 5 1/4"  (inside panel)               Assembly:               1.  Adhere Layer 1 to front center of card vertically.               2.  Adhere embossed Layer 2 to front center horizontally               3.  Punch banner end at bottom of DSP (Layer 3) and adhere to front center vertically, about 1/4"                     down from the top fold.               4.  Stamp your sentiment on Basic white layer horizontally with Eve

Amazing Silhouettes

Image
Card #1 Card base - Soft succulent 8 1/2” x 5 1/2” Score at 4 1/4” Layer #1 Basic white  4 1/8” x 5 3/8” Layer #2 2021-23 In-color DSP  (Soft succulent) 4” x 5 1/4” Focal point Basic white 5” x 2 1/2” and 4” x 5 1/4” (inside panel) Scraps of Basic black and Basic white for sentiment die cuts Amazing Silhouettes Stamp set Amazing Thanks dies Soft Succulent ink Brushed brass butterflies Glue layers 1 and 2 onto card base Stamp tree onto white focal point piece. Use dimensionals to adhere to left side of card front, leaving an even boarder on three sides.  Die cut “Thanks”  background in black and script in white Glue two pieces together.  Use glue to attach on left side and dimensionals on right side — over the focal piece.  Stamp butterfly on bottom right side of inside panel.  Adhere to inside of card.  Add butterflies to tree image.  Card #2 Card base - Thick Basic white 8 1/2” x 5 1/2”       Scored at 4 1/4” Layer #1 Rainbows and Sunshine DSP - Striped pattern       1/2” x 5 1/4” Bas